Showing posts with label decorating. Show all posts

Friday, May 7, 2010

Love at Home Vinyl

I am noticing hints of this pretty patina blue creeping into my home. I love this color, and I love the freshness that it adds to my red, green, brown home.


This vinyl design is one that I put together for my friend's cub scout group. They are planning to put it on small wooden plaques for Mother's Day. I had just one left, so I grabbed a black frame, spray painted it and added the paper behind. The vinyl is on the glass. I like the shadowbox effect. Once I had it finished, I had to tone the blue down just a bit with a little brown ink and a sponge.

Wednesday, April 21, 2010

Hooked on Building

This is a blast! If there is anyone out there that still hasn't checked out Ana's site, 
do yourself a favor and spend some time there. I have a list of projects that I am itching to start. The first one that called to me was the bankable bookcase and I did it!


 My husband helped me out with the cuts on the table saw. Those sheets of wood are Heavy! But other than that, it is my project. I know that he was more than happy to help me out; he is the greatest. But I really wanted to do it by myself
(wow, that really sounds like Addy, my 2 yr. old.)

Here it is, primed and ready to paint.


Check out my cute shop assistant.


I should have asked for help measuring, I measured where I wanted it about 10 times. I was so worried that it wouldn't fit. Our house is very small, and everything has to fit just right 
(like a puzzle).


Guess what? it doesn't fit !?!???
I didn't think to measure the doorway, I wanted to cry. After all that work, I couldn't put it in the closet the right direction. So instead of seeing my cute bookshelf with toys and boys all nicely organized (at least for the picture) I can only see the end. Because of the width of the doorway and the light fixture, I can't turn it. The walls are all dinged up now, too, from my trying. 


I thought about moving it to Cort and Chan's bedroom, but after all of Collin's work on it, I couldn't just give his bookshelf away. Maybe after I finish one for each of them, I will have them trade. But for now, we get to enjoy it from the end.


 I love this color, it looks great in Collin's room. I wish that I had a better picture 
of the finished project, but I didn't bother to take one in my workshop (kitchen) 
because I was going to get it once it was in the closet, 
oh well... I will do better next time--you better believe there will be a next time.  
This is so fun!

Knock-Off Wood 

Wednesday, February 3, 2010

Shiny Brass to a Little More Class

Our goings on lately have included completely re-doing our master bedroom. I mean ripping the yucky drywall with a ton of holes out, pulling out the lathe and plaster, adding insulation and new windows and brand-new walls. We are doing this on a shoe-string budget, so the decorating part has a 
budget of close to $0. 


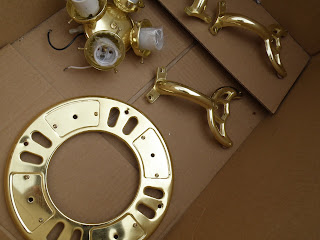
We originally purchased this ceiling fan about 14 years ago when we were first married and it has traveled with us from apartment to townhouse to this house, it was a huge purchase for us then; and I remember lying in my bed admiring how pretty it was with the sparkling, shiny brass. 

Well... styles and my tastes have changed since then. I would love to throw the whole thing out and start over, but since our budget doesn't include a new fixture and I don't want a hole in my ceiling; I decided to try to transform it a bit.


I used two different spray paints, Hammered Bronze for the metal, and Caramel Latte for the blades. Since it is so very cold outside, my spray painting takes creativity. I put the metal pieces in two large cardboard boxes, shook the paint really well and took one box at a time outside to spray the pieces and raced back inside with the box, it took some juggling. 


Even moving as fast as I could, it was still too cold. I think the bubbles that form the textured finish were small and didn't spread as well as they should have. The brass still peeks out a little, but I think it gives the color some depth.

More pictures of the transformation to come later.


I am linking to:

Tuesday, February 2, 2010

Milk Can House Numbers

My brother-in-law stopped by with this milk can a couple of weeks ago, asked if I wanted it, and said that he would like to see what I came up with. I hope he approves.


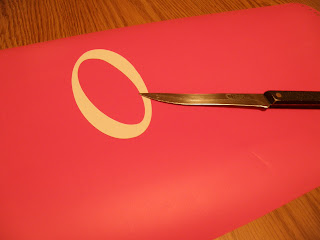
I chose to paint our house numbers on it. I used my Silhouette to create a stencil out of vinyl, I had planned to use contact paper; but I guess I ran out. For anyone considering a digital craft cutter for vinyl, paper and cardstock; I would suggest checking out the Silhouette. It hooks up to my computer and can cut any font that I can download along with tons of designs. I LOVE MY SILHOUETTE!


I scrubbed the milk can a bit, no need to rough it up with sandpaper; it was rough enough already. I chose to paint it Satin Black, so it would stand out against our house. 


This is the kind of weeding I like, I have always planned to get the fun tools to do this; 
but a sharp paring knife works so of course, I haven't.


I masked the can off, so the paint wouldn't overspray. Then I used my fun spray outside and run back in with the project technique. I am sure that anyone driving by would wonder what in the world I am doing running in and out of my house and 10:30 at night. This time I went fast enough and didn't end 
up with any wrinkles from the cold in my paint.


I left it inside for a couple of days to make sure that it was really dry, and then took it outside where it will likely stay. I don't love taking pictures of my house in the winter, but this summer it will look great with flowers all around. The milk can has already made it through a couple of snowstorms and still looks great.


I am linking to: 

Tuesday, January 26, 2010

What was I thinking?!!

I am sorry for the delay in posting the winner of the Wha-Cha-Ma-Call-Ums give away. I don't know what I was thinking! When I told my sweet husband about the give away/contest I was hosting he laughed at me. I can't make a decision to save my neck. He always has to help me decide...

So now I get about 38 fantastic suggestions and I have to choose just one. I finally chose my 5 favorite and then used the random number generator to choose for me.


The winner is Love Signs by Maridith at Strictly Homemade. She has a great blog, with fun ideas, check it out. E-mail me with your address Maridith, and I will get your kit on your way.
(Please confirm your word and color choice.

For everyone else, I will post a tutorial soon so you can make your own Love Signs.

Have a great day!

Friday, January 22, 2010

I'm Finished! My Girls Names

Don't forget to enter the Wha-Cha-Ma-Call-Ems give away!

Do you ever have those projects that are supposed to be so simple, but go on and on and on.......?

This is one of those, I started making these with my friend, Carrie, last spring. I had just finished my very first set of blocks and I had blocks on the brain. They were supposed to be a two afternoon project. Cut, sand, stain wood one day and then mod podge and embellish the second.

About 9 months later, we both finally have ours done. The funny thing is, in the meantime, my girls were given bedding that they love and it actually coordinates better than they did before!

My favorite part is the flowers, I mod podged regular silk flowers. I only put a light coat on so they would keep their shape. Alexis thinks that hers looks like it is made out of wax. The flowers are so pretty.

We realized as we worked on these, that in order to not have screws showing; we would need to modpodge the bottom layer of paper on and then screw the blocks together and then embellish the tops to cover the screws...as I write this I realize that we could have just screwed them together from the back, duh! Oh well, I rarely do things the easiest way first.
I am planning to put some shelves in their room after it is repainted, but for now, these will hang on the wall. Happy Finishing Day!


I am linking to: 

Tuesday, January 19, 2010

I "heart" u stacking cubes

don't forget to enter the wha-cha-ma-call-ums give away


I "heart" stacking blocks. These are simply 4x4 posts cut into blocks, sanded, stained and decopauged with cute valentine paper and embellished with vinyl. They really should not have caused stress...unfortunately my stress level right now is really high so it doesn't take much to send me over the edge.


I did finally finish these, and I really like them. They are also for our Relief Society craft mini class.


I would love suggestions that any of you have for preventing bubbles from forming under the paper. I generally don't have a problem with this, but it was harder with this project than others I have made. I did finally come out with a nice result, but I am sure there must be a better (easier) way.

Wednesday, January 6, 2010

DIY Custom Storage Cubes

When we moved into our house it didn't have any closets, not one! We have gradually added closets and cupboards as we have remodeled but there is still a serious storage issue in our house. I love the storage cubes that can double as ottomans and be set together for a type of coffee table; but I haven't ever seen any that I like for my house, and are affordable.

What's a girl to do? Make my own, of course. I used the same fabric and milk crates from this post and they look suspiciously similar. I originally took pictures to put a tutorial together, but with all my picture re-organization this last month, these are the only two that survived.

I started with this:

I wrapped the crate with thin batting, it is just hot glued onto the basket. After the batting was on the crate, I set it in the middle of the upholstery fabric and wrapped the basket like a present. I didn't worry too much about the edges on the inside, because I planned to line the basket. Unfortunately, I made the mistake of starting to use them right away because I had run out of fabric; and now I have never gotten around to lining them.

After the outside was covered and the corners were folded in nicely (just like making a bed), I cut a piece of 3/4" plywood just a bit larger than the top of the crate for the lid. Using a piece of 1"seat cushion foam, and more fabric I covered the top of the plywood lid just like you would cover a seat cushion for a chair.

I used two hinges screwed directly into the plywood and the top edge of the crate to attach the lid. I was nervous that the screws would work out of the crate since it is just plastic but I couldn't think of another way to attach them.

After the lid was on, I folded the edges under on and lined the lid with another piece of fabric, this edge does show a lot so it was important to make sure it was lined well.

We have enjoyed these boxes, they are used for extra seating, particularly for playing video games, I store magazines and toys in them. And amazingly enough, they have held up to my crazy crew. Now that we have lived with them for a while, the only thing that I will change when I make some for my kids' rooms is to add small wooden feet. I lift and carry them, but of course, my kids scoot them across the floor, and the fabric on the bottom is beginning to wear.

What do you think? I would love to see any ideas you have for storage issues, especially in small spaces.

I am linking to:
Shanty 2 Chic

Monday, January 4, 2010

My life is "sort of" mine again.

My kids and husband went back to school today. Back to our regular schedule. I loved having my husband home for the Christmas break, I loved the time with my kids and I was very sad to see them all go back this morning. My little ones were lost without the "big kids".

I want to share a couple of projects that I put together during the break (but didn't have time to share).

First off, after about 5 million ideas, this is what we finally put together for neighbor gifts. Monogram Plaques. I love them. Simple and pretty classic. Black and cream is one of my favorite color combinations. Now I need to make one for myself. I am also planning to make some for upcoming weddings. I think they would be great in the center of a family picture collage or in an easel.

(As a note, you can remove sharpie marker from the vinyl with a tiny bit of nail polish remover, Thank you Addy! our little marker girl for initiating this little experiment.)

Linking to:


Second project, have you seen these snowflakes? Who knew that paper snowflakes could be so cool? Check out this tutorial. We made some for my sister's 20 something foot tree, I love them with glitter and double sided scrapbook paper. My sister-in-law, Keli suggests cutting the strips very narrow, they are gorgeous.

Just a note, use scotch tape instead of staples, it works so much better for the center section and is prettier over all.

Third project, chargers. This is what I made for the favors for my husband's family Christmas party. It is just vinyl on the plate, and I love it. Inexpensive with just a little glitz. Try a piece of metal glued on the back and it becomes mini magnet board.

What do you think? What was your favorite project this Christmas break?

The monogram plaques and vinyl only options are in my etsy shop.

Tuesday, December 15, 2009

Crafting with my sister.

One of my very favorite things to do is, to hang out with my sister, Bekki. She was here visiting just before Thanksgiving and generously helped me out preparing for my craft fair. It was so fun to be creative together. We decided that we would really like to have a whirlwind craft marathon again (this time we want to keep the projects, not sell them).

This Christmas Countdown Calendar was one of our favorite creations that week. They all sold really well at the craft fair, so I made some more.


You can find these in my etsy shop, or have fun making some of your own. I love my set.

Thursday, December 10, 2009

Baby, It's cold outside!


Brrrrr!
We are freezing over here. It always gets cold here in the winter, but the extreme cold usually waits until later in the winter. We have been hitting the negative digits every day. Our water pipes have frozen twice and now we have a big ugly haystack on our pumphouse in an attempt to insulate it so that we will have water, my husband's ignition was frozen so his car wouldn't start, and my kids haven't been able to play outside at recess. They are bouncing off the walls!!!

These blocks seem appropriate right now.

Wednesday, December 9, 2009

Vintage Window...Of course I want it.

My friend offered this window to me. I love the shape and so, of course, I said "yes". Unfortunately, I have very little wall space in my house, so I really wasn't sure what I was going to do with it. It has been sitting for a couple of weeks. But today I decided that I was just going to hang it up before it gets broken. I figured that I was unlikely to love the placement; but I can always change my mind.

I decided not to paint it yet, I really do like this color anyway; but I am also a little lazy...I knew that I wouldn't want to paint it again. So, I am waiting to decide for sure what I want to do with it after Christmas is over.

The only supplies that I spent money on (and I really should not have) are the wreaths. They are just dollar store specials. The rest of the supplies are from my "stash". I have had the pip berries for a couple of years, I am determined to use them this Christmas before any more explode --why do they do that?

The hardest decision for me was what color of ribbon to use; I really wasn't loving any of these, but I was NOT going to spend any more money. Which do you like? I finally settled on layering the first two ribbons.

Here it is with lights, ribbons, wreaths and berries. I would still like to hide the rest of the lights; but I do like it. I like that this part of my nativity set collection has a backdrop now.

I apologize for the picture quality, I couldn't wait to take pictures...I really wanted to finish it tonight.

Tuesday, November 24, 2009

Quick and Easy Neighbor Gift


The credit for this idea has to go to my friend, Karla. I made the tags; she thought of dressing them up in a frame to make a quick and easy gift for neighbors, teachers or friends.

I stamped the ornaments on cardstock and mounted them on thin chipboard (for stability), backed them with cute scrapbook paper and framed them in a rustic pine frame. Of course, they need a cute ribbon. I think they will be lots of fun to give.

I also love the idea of framing a handmade card.

Quick, easy and cheap. My idea of a perfect gift to give.

If you don't have time to make one (or several) on your own. This design is available in my etsy shop.

Tuesday, November 17, 2009

My new favorite addiction.


I received a Silhouette Craft Cutter for Mother's Day this year, I was super excited to get it; but then it sat for a couple of weeks. Now that I have really learned to use it, I can't imagine a week without using it. ;)

I used it to create freezer paper stencils for these blocks. I am having a blast with stenciling. I think these blocks would make great neighbor gifts...very quick and inexpensive. Just combine some duck cloth, acrylic paint, upholstery tacks, scrap 2x4's, freezer paper and whatever ribbon you have laying around. Have fun with this.

(these are also available in my etsy shop)